New Release — 1.9 RU/EN
Major changes to scripting and the available APIs, a switch to a new monetization model, and a lot more.
Monetization changes — Free becomes Pro
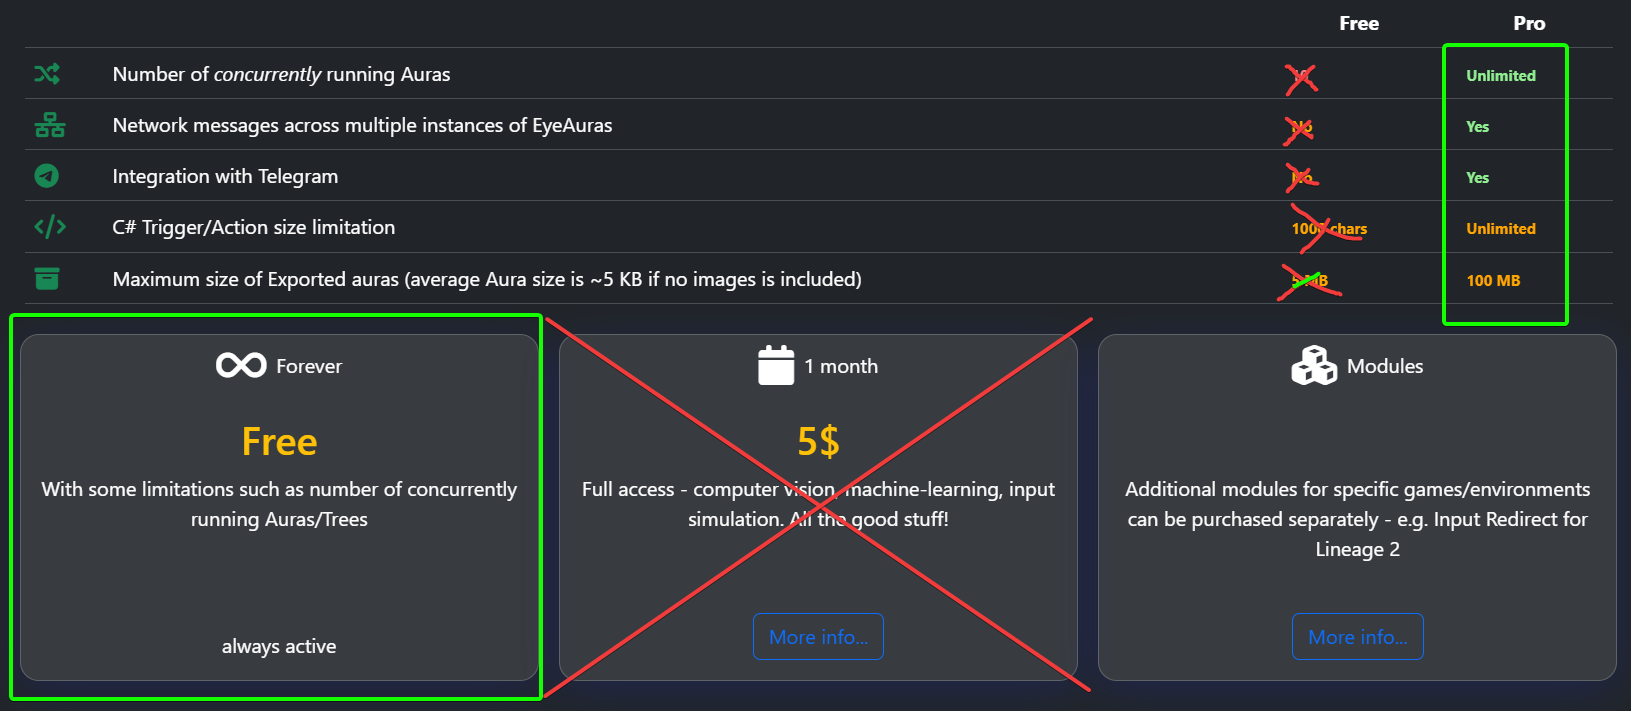
All limitations that existed in the Free version are removed — no more limits on the number of auras, script size, Telegram integration, etc.
p.s. A license is still required for sending network messages, but this restriction will be removed soon as well once I sort out the technical details — most likely by the next release.

So… no license needed anymore?
Yes. Everything that used to be locked behind a license is now available to everyone. In the very near future, the license purchase options will be removed from the website.
Do I still need a connection to the program’s server?
For now — yes. This is tied to how the program protects its modules and, at the moment, it’s an integral part of the system. Over the coming year I’ll try to revisit this approach, but it will take time. At the very least, I need to implement a mechanism that allows using the program offline for at least a few months.
Why?
With the development of sublicenses and mini-apps (https://eyeauras.net/share/S20251105201607zPUUkZryl4CY), it feels right to shift the focus toward monetizing finished products built on top of the platform — while making the platform itself free. The entire foundation accumulated over 6 years of development is now available to everyone, and I hope this will nudge creators who were previously on the fence: “is it even worth trying to build something?”
Further development will focus on making it easier to add modules to the program — for example, specialized input simulators useful for a specific game, or ready-to-use mini-apps that solve practical tasks. All of this is already possible today, but the information is scarce and scattered. That will be fixed.
But I bought a license only recently — can I get a refund?
Message me privately — I’ll try to help you out with this inconvenience.
What’s coming in 2026
- improving the user experience around publishing mini-apps and other scripts/aura packs
- Unreal-like Blueprints — this idea has been in the air for a long time, and I’m going to try it out on one of the bots we’re developing right now. The core idea is to merge the Aura system and Behavior Trees into a single whole, so that one tool (Blueprints) can solve very different kinds of tasks
- Sublicenses — the mechanism is already working, but right now many parts of it are manual; they need to be automated
- More documentation — one of the main issues with the program right now is that it has too much stuff in it; the feature set has been accumulating for years and isn’t always well documented. These days, when a lot of questions are answered via LLMs (ChatGPT, Gemini, etc.), the quality and volume of API documentation is a decisive factor. I’m planning to dedicate a few weeks exclusively to this — possibly bringing in a specialist
C# Scripting — Embedded Resources
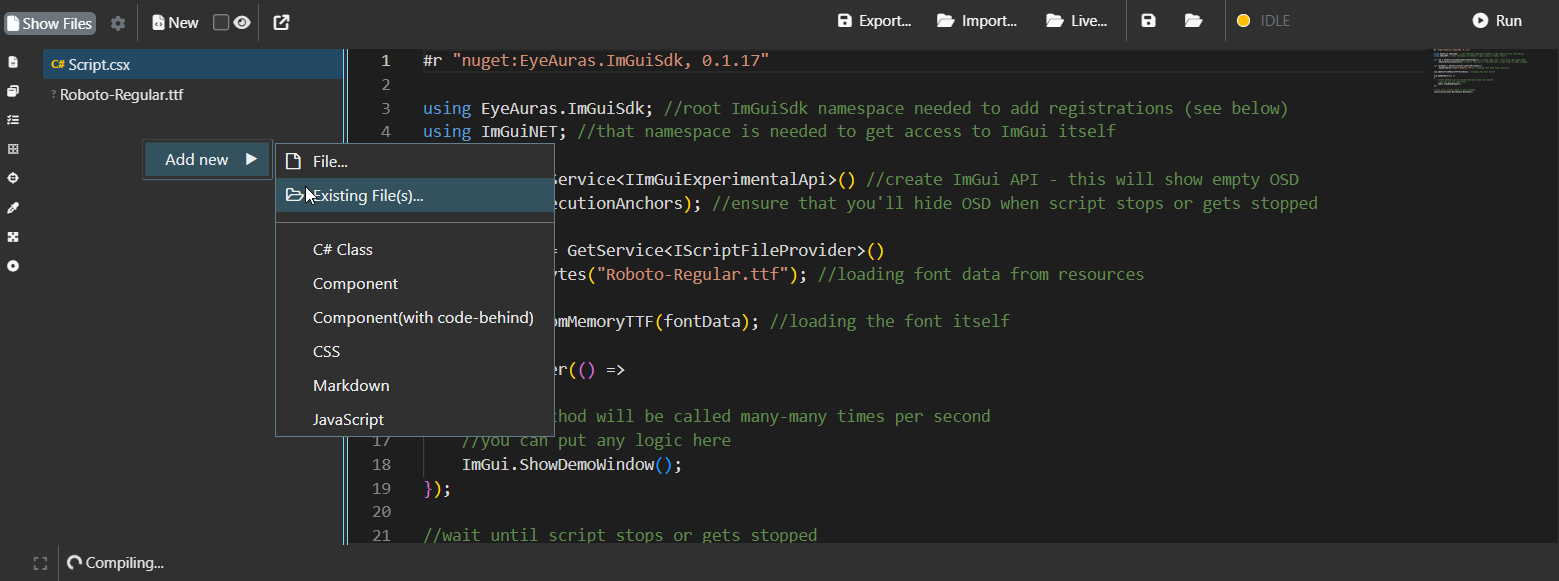
A very powerful mechanism has been added to scripts — you can now embed whole files directly into your script: images, video, text, or even DLL/EXE files. And then work with them right from the script — display them in the UI, load them into Triggers/Actions, or simply unpack them to disk for later use. This is especially useful if you want to bundle a library that isn’t available on NuGet — now it’s enough to attach the file to the script and specify that the program should use it as a dependency.
Moreover, if you’re using C# Script protection, these resources will also be encrypted as part of the script, protecting your work and copyright.

C# Scripting — Variable improvements
Updates to the script variables system — the approach to handling exceptional situations has been slightly changed. The goal is to make scripting simpler for new users.
C# Scripting — IDE integration
 Since last year, the program has had an IDE integration mode — in practice, it’s a way to write full-fledged programs while staying inside the EyeAuras infrastructure.
You can edit the script directly from JetBrains Rider / Visual Studio or any other development environment, including AI-based ones — for example Antigravity by Google. This makes writing even small scripts faster and easier, not to mention larger projects.
Performance improvements
This version includes more than a dozen tweaks and optimizations aimed at improving load times and speeding up internal subsystems.
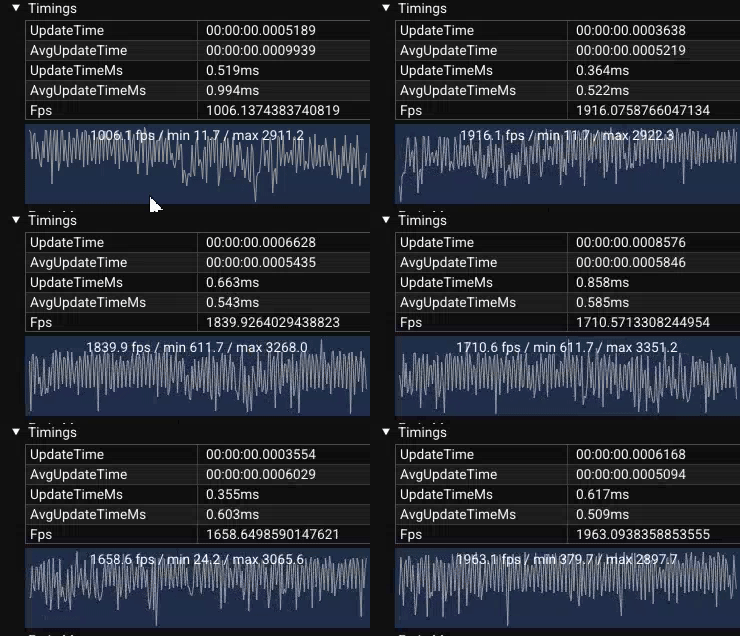
Testing based on an ImGui bot that uses memory reading shows that it’s now possible to operate in the ~2k FPS range — INCLUDING the cost of memory read operations and parsing all required game structures. Before the fixes, the numbers were around 500 FPS.

Please report any issues you run into!
Bugfixes/Improvements
- [Crash] Fixed a problem with the License window crashing on startup
- [EyePad] Recents are now ordered by date (desc)
- [Scripting] Added a new “Open in IDE” button, which allows editing the script in Rider/Visual Studio and seeing changes reflected in EyeAuras in real time — [more here...](/scripting/ide-integration)
- [Scripting] Embedded Resources fixes — made the Script FileProvider more flexible (it now understands more path formats)
- [Scripting] Fixed a bug in Live Import — it should now properly detect changes in
.csproj - [Scripting] Improved script deallocation — even if a user script contains dangling references, EyeAuras will try to clean them up if the script is no longer running
- [BehaviorTree] Fixed an issue with circular references — it caused the UI to show connections that aren’t actually there
- [BehaviorTree] Added a new node — SetVariable. It’s still in a very early phase, but I decided to ship it early just to test it out
- [BehaviorTree] Improved BT performance
- [SendInput] Fixed an issue with the TetherScript driver — on some resolutions/DPI, mouse clicks would also slightly move the cursor (+-1px). One more thing: please make sure you’re using a compatible driver version so everything works as expected — HVDK 2.1, more info on this page
Bugfixes/Improvements
- [Scripting] Improved NuGet packages resolution - should solve problem of baseline assemblies conflicting with packaged ones
- [Scripting] MemoryAPI - added
NativeLocalProcess- very similar toLocalProcess, but uses a bit lower-level reading technique and allows to use handle to the process as a starting point - [Scripting] MemoryAPI - added DLL injection via manual mapping - allows to avoid some detection vectors
Bugfixes/Improvements
ALPHA! Performance improvements
This version contains more than a dozen different improvements and performance optimizations which I have preparing for quite some time at this point. For the next couple of weeks there may be instabilities, but for most use cases, especially for scripting in EyePad, this should be night and day difference.
Tested improvements on ImGui-based bot - it is now possible to push 2k fps range. That is WITH memory reading and parsing all needed game structures! So, basically, that is bot-loop running at ~2k ticks per second - before these fixes FPS was around 400-500.

Next goal will be working on stabilizing the FPS and making it smoother, right now it is quite "spiky" - I already wrote about adapting new prototype-GC in changelog for 1.7.8559 a couple of months ago, this should help exactly with that goal.
Please report anything you'll notice!
Bugfixes/Improvements
- [Scripting] Improved Scripts deallocation - even if user script contains some dangling references, EyeAuras will try to clean them up if the script is no longer running
- [BehaviorTree] Improved performance in BTs
Bugfixes/Improvements
- [Scripting] Embedded Resources fixes - made Script FileProvider more flexible (now understands more formats of paths)
- [Scripting] Fixed bug in Live Import - now should property detect changes in
.csproj - [EyePad] Recents are now ordered by date(desc)
- [BehaviorTree] Added new node - SetVariable, it is still in very early phase, but I decided to drop it earlier just to test it out
Wiki
C# Scripting - IDE Integration
- IDE Ingegration - details about integration with IDEs (Rider/Visual Studio) via LiveImport
Bugfixes/Improvements
- [Crash] Fixed a problem with License window crashing on startup
- [Scripting] Added new button "Open in IDE", which allows to edit the script in Rider/Visual Studio and see them reflected in EyeAuras in real-time - more here...
C# Scripting - Embedded Resources - alpha
Added new very powerful tool into our toolkit - now you can embed arbitrary files, be it images, videos, text files or even DLL/EXE files right into your script. And then, from that very script you can do whatever you want with them just like if they would be right there on the disk. This opens up a lot of new possibilities - embedding guiding materials into scripts, bringing your own assemblies which contain some custom code or even entire installers of tools which your script might use.
Moreover, with use of C# Script protection it is possible to protect those resources with encryption, making it much harder to extract and re-use outside the script. I'll announce separately when that part of functionality will be publicly available.

Please report any issues you'll find in that part of the system!
C# Scripting - Variables improvements
Improved EyeAuras resiliency around script variables management - now none of default methods (accessing variable value or listening for its changes) are throwing exceptions, making it easier for new users to pick up and use.
General idea is to bring things closer to Python/JavaScript as usually in scripting you want as much flexibility as possible. At the same time, C# is strongly-typed language, thus striking the balance is not easy. This is the second iteration of variables, so we'll see how it goes.
Wiki
C# Scripting
- Embedded Resources - details about new functionality which allows to embed files into Script
- Variables - more details about how to work with Script variables
- Setting window size from the script
C# Scripting - ImGui
Bugfixes/Improvements
- [UI] Minor fixes in how behavior trees are loaded
SendSequence changes
Added two new flags, which target the scenario when you want to play some long-long sequence of actions, but at the same time you want to make it possible that it could be interrupted at any given moment.
E.g. you have a sequence of skills, which are cast inside WhileActive block. Now you want to be able to interrupt it at any given moment (e.g. by toggling hotkey to "Off" state). Previously it was not possible to do so without using Behavior Trees or Macros. But now, with these two new options, it is just a couple of clicks
Can Be Interrupted
As stated in the name, it changes behavior of the action - if, for any reason, Aura gets deactivated, the action will be stopped, even if the sequence has not been completed yet.
But abruptly stopping sequences of inputs is not really a great idea most of the time - if, for example, action has pressed some button and NOT released it yet, if it will be interrupted, the button will stay pressed, probably breaking something.
That is where the second flag comes in handy:
Restore Keyboard State
This flag remembers keys, pressed by the sequence and will release them automatically at the end of the action. So even if the action was interrupted in the very middle, there will be no "stuck" keys.
Macros - Return/Break nodes
Adding two new nodes which should help to create better and smarter Macros!
Return
Return node allows you to exit the macro whenever you want to, even right in the middle of some sequence of operations.
E.g. if character has died it does not make much sense to continue running the main loop.
Equivalent of return operation in C#
Break
Break is more niche - it allows you to exit the current scope (not the macro!), e.g. if you're inside some Repeat loop, you can jump out of it if needed.
Equivalent of break operation in C#
C# Scripting - DLL injection
For the last couple of months I've been working on internal improvements of EyeAuras.Memory namespace. The goal is to extend capabilities and to support
DLL injection and hooking of external processes.
For now, I am releasing only one bit of the entire set of improvements - LocalProcess now has InjectDll method which uses naive CreateRemoteThread based injection.
This will not help with kernel anti-cheat protected projects. We're already testing kernel-driver based solution which allows to counteract that inconvenience - I'll keep you posted.
DLL injection brings a lot of interesting and powerful things to the table - the topic is very niche and technical, but in the next 6-12 months I'll be trying to make it accessible to anyone with some C# skills, without deep understanding of internals.
Wiki
C# Scripting - Blazor Windows
Added a series of articles in Russian/English about programming using EyeAuras Blazor Windows API
- Intro
- WebView
- Hello, World
- Creating a Toggle
- Making UI Interactive
- Adding multiple different controls
- Applying styles
- Inline CSS
- External CSS
Behavior Tree / Macro
Added a whole bunch of articles about Behavior Tree / Macro nodes. Note that most of these articles are available in both Russian and English.
- IsActive - checks whether parent Tree/Macro is currently Active
- Interrupter - (advanced) node, that allows to break execution of Behavior Tree if some condition is met
- Return - allows to stop the macro
- Break - allows to Break from the loop or code block
- MouseMove Abs - moves cursor somewhere on the screen (or to something)
- MouseMove Rel - moves cursor relatively to its current position
- CheckKeyState - checks whether some key is currently being held
- KeyPress - simulate keypresses
- Send Text - inputs text either via copy-pasting it or inputting each character individually
Bugfixes/Improvements
- [Crash] Fixed ColorSearch template-related crash (disposal race) #EA-1146 by @ganya
- [Crash] Fixed BT Node Position NaN crash
- [Crash] Fixed crash which happened when Export window was closed too quickly
- [Core] Fixed Trigger activation mode - "At least one" as not working properly
- [Core] Fixed bug which made it so Auras were loaded with invalid initial state, e.g. Triggers are Inactive, yet Aura is Active. Please report if you'll notice that problem again.
- [UI] Improved error display in
C# Scripts - [UI] Fixed text editor soft-crash which happened in some cases
- [UI] Fixed jobs scheduler crash #EA-1121
- [UI] Fixed a problem with UI elements sometimes not showing scroll
- [UI] Disabled Cogs animation
- [UI] Fixed a problem with color picker in ColorCheck/PixelSearch
- [WaitFor]
WaitForaction now behaves exactly asDelayif it does not have any links in it - [TextSearch] Fixed
Tesseract (numbers)not initializing properly - [SendSequence] Added Random Offset (like in MouseMove nodes)
- [SendSequence] Fixed a problem with Restore Mouse position not working as expected in some cases
- [SendSequence] Added chill time 1ms to TetherScript - this should fix a problem with TetherScript driver not being able to read requests fast enough
- [BehaviorTree] Fixed a major visual bug which sometimes removed multiple nodes from the tree instead of a selected one
- [CheckIsActive] Fixed node not being properly redrawn
- [Scripting] Made it possible to implement EA-based authentication mechanism right in your code, meaning you can code your own login procedure which will be relying on EyeAuras Sublicenses
- [Scripting] Fixed an issue with
LocalProcessmemory-reader breaking after multiple sequential reloads - [Scripting] Improvements in scripting system - added AdditionalPath resolution for Managed assemblies in NuGet packages
- [Scripting] Improved script obfuscation quality
- [Scripting] Added GetCurrentColor in ColorCheckNode
- [Scripting] Added EngineId to TextSearch in CV API - now you can specify which OCR engine to use, e.g.
Tesseract (eng)orWindows (rus) - [Scripting] Breaking change:
ISharedResourceRentController:IObservable<AnnotatedBoolean> IsRented=>IObservable<AnnotatedBoolean> WhenRented+bool IsRented - [EyePad] Greatly improved loading performance for larger
.slnfiles - [EyePad] Added Recent files